


公告
欢迎来到我的博客!修复了副标题无法自动更新文本的问题.
1420 字
7 分钟
部署搭建LAMP-LNMP-WordPress
前言
如果你发现安装不了第一步的包时你需要去看上一篇文档的换源操作
安装必要软件包
系统工具包
包含 wget vim 两种包
#安装wget vimyum install wget vim epel-release -y安装 Apache Web 服务器
#安装 Apacheyum install httpd -y
csystemctl start httpdsystemctl enable httpd
# 配置防火墙firewall-cmd --permanent --add-service=httpfirewall-cmd --permanent --add-service=httpsfirewall-cmd --reload安装 MariaDB 数据库
#安装 MariaDByum install mariadb-server -y
#设置开机自启systemctl start mariadbsystemctl enable mariadb
# 安全初始化(设置root密码,移除匿名用户等)mysql_secure_installation安全初始化说明
部分直接使用翻译是否启用自行斟酌 这里可能需要登录,默认密码为空直接回车即可
#这里是问你是否重置或创建新密码Setting the root password ensures that nobody can log into the MariaDBroot user without the proper authorisation.
#这里直接选择是ySet root password? [Y/n] yNew password:Re-enter new password:Password updated successfully!Reloading privilege tables..#创建成功提示 ... Success!
By default, a MariaDB installation has an anonymous user, allowing anyoneto log into MariaDB without having to have a user account created forthem. This is intended only for testing, and to make the installationgo a bit smoother. You should remove them before moving into aproduction environment.#默认情况下,MariaDB 安装会有一个匿名用户,这使得任何人无需创建用户账户即可登录 MariaDB。这仅用于测试目的,以使安装过程更顺畅一些。在进入生产环境之前,你应该删除这些匿名用户。
Remove anonymous users? [Y/n] n ... skipping.
Normally, root should only be allowed to connect from 'localhost'. Thisensures that someone cannot guess at the root password from the network.#通常情况下,应该只允许 root 从 “localhost” 进行连接。这能确保没有人能从网络上猜出 root 密码。
Disallow root login remotely? [Y/n] n ... skipping.
By default, MariaDB comes with a database named 'test' that anyone canaccess. This is also intended only for testing, and should be removedbefore moving into a production environment.#默认情况下,MariaDB 带有一个名为 “test” 的数据库,任何人都可以访问。此数据库仅用于测试目的,在进入生产环境之前应将其删除。
Remove test database and access to it? [Y/n] n ... skipping.
Reloading the privilege tables will ensure that all changes made so farwill take effect immediately.#重新加载权限表将确保到目前为止所做的所有更改立即生效。
Reload privilege tables now? [Y/n] n ... skipping.
Cleaning up...
#全部准备好后出现这个提示则表示成功All done! If you've completed all of the above steps, your MariaDBinstallation should now be secure.
Thanks for using MariaDB!安装 PHP 7.4
# 添加Remi源wget http://rpms.remirepo.net/enterprise/remi-release-7.rpmrpm -Uvh remi-release-7.rpmyum update -y
# 安装PHP 7.4及扩展yum --enablerepo=remi-php74 install php php-cli php-fpm php-mysqlnd php-gd php-json php-mbstring php-xml php-zip -y
# 验证PHP版本php -v # 应显示PHP 7.4.x下载并安装 WordPress
cd /tmpwget https://cn.wordpress.org/latest-zh_CN.tar.gztar -xzf latest-zh_CN.tar.gz
# 复制文件到Web根目录cp -r wordpress/* /var/www/html/chown -R apache:apache /var/www/html/配置 PHP 与 Apache 集成
# 编辑Apache配置文件vim /etc/httpd/conf/httpd.conf
# 在文件中添加以下内容(在LoadModule区域后)# LoadModule 后的内容视版本决定,你是什么版本就选择那个版本LoadModule php_module modules/libphp.so #8.x版本LoadModule php7_module modules/libphp7.so #7.x版本AddHandler php-script .phpDirectoryIndex index.php index.html
# 重启Apachesystemctl restart httpd验证 LAMP 环境
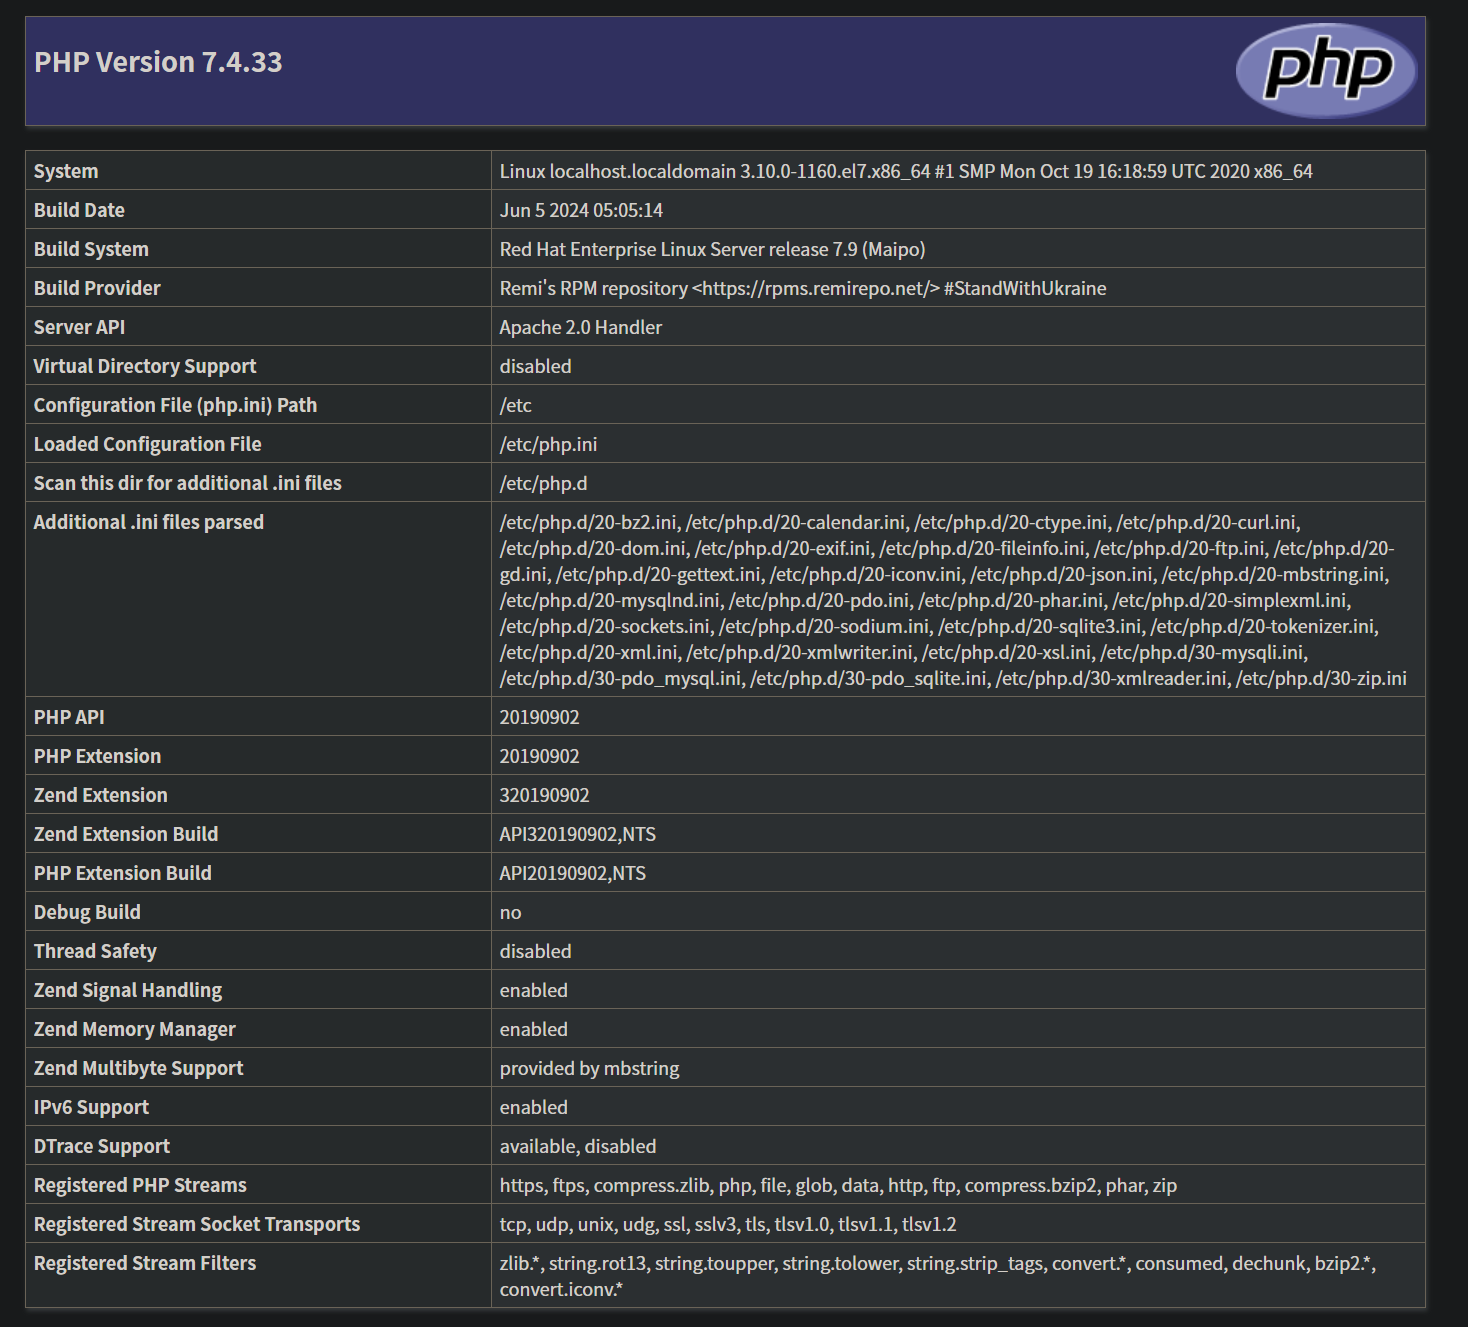
创建 phpinfo.php 测试文件
#创建文件并写入echo "<?php phpinfo(); ?>" > /var/www/html/phpinfo.php#赋予权限chown apache:apache /var/www/html/phpinfo.php
#成功后访问地址http://你的ip地址/phpinfo.php示例图
WordPress 部署
创建 WordPress 数据库
# 登录MySQL(使用之前设置的root密码)mysql -u root -p
# 创建WordPress数据库和用户(wordpress为数据库名)CREATE DATABASE wordpress DEFAULT CHARACTER SET utf8mb4 COLLATE utf8mb4_unicode_ci;CREATE USER '用户名'@'localhost' IDENTIFIED BY '数据库密码';GRANT ALL PRIVILEGES ON wordpress.* TO '用户名'@'localhost';FLUSH PRIVILEGES;EXIT;配置 WordPress
# 创建配置文件cd /var/www/htmlcp wp-config-sample.php wp-config.phpvim wp-config.php
# 修改以下配置(找到对应行并替换)(wordpress为数据库名,需要填上你上面那个步骤创建的数据库)define('DB_NAME', 'wordpress');define('DB_USER', '用户名');define('DB_PASSWORD', '你的密码');define('DB_HOST', 'localhost');
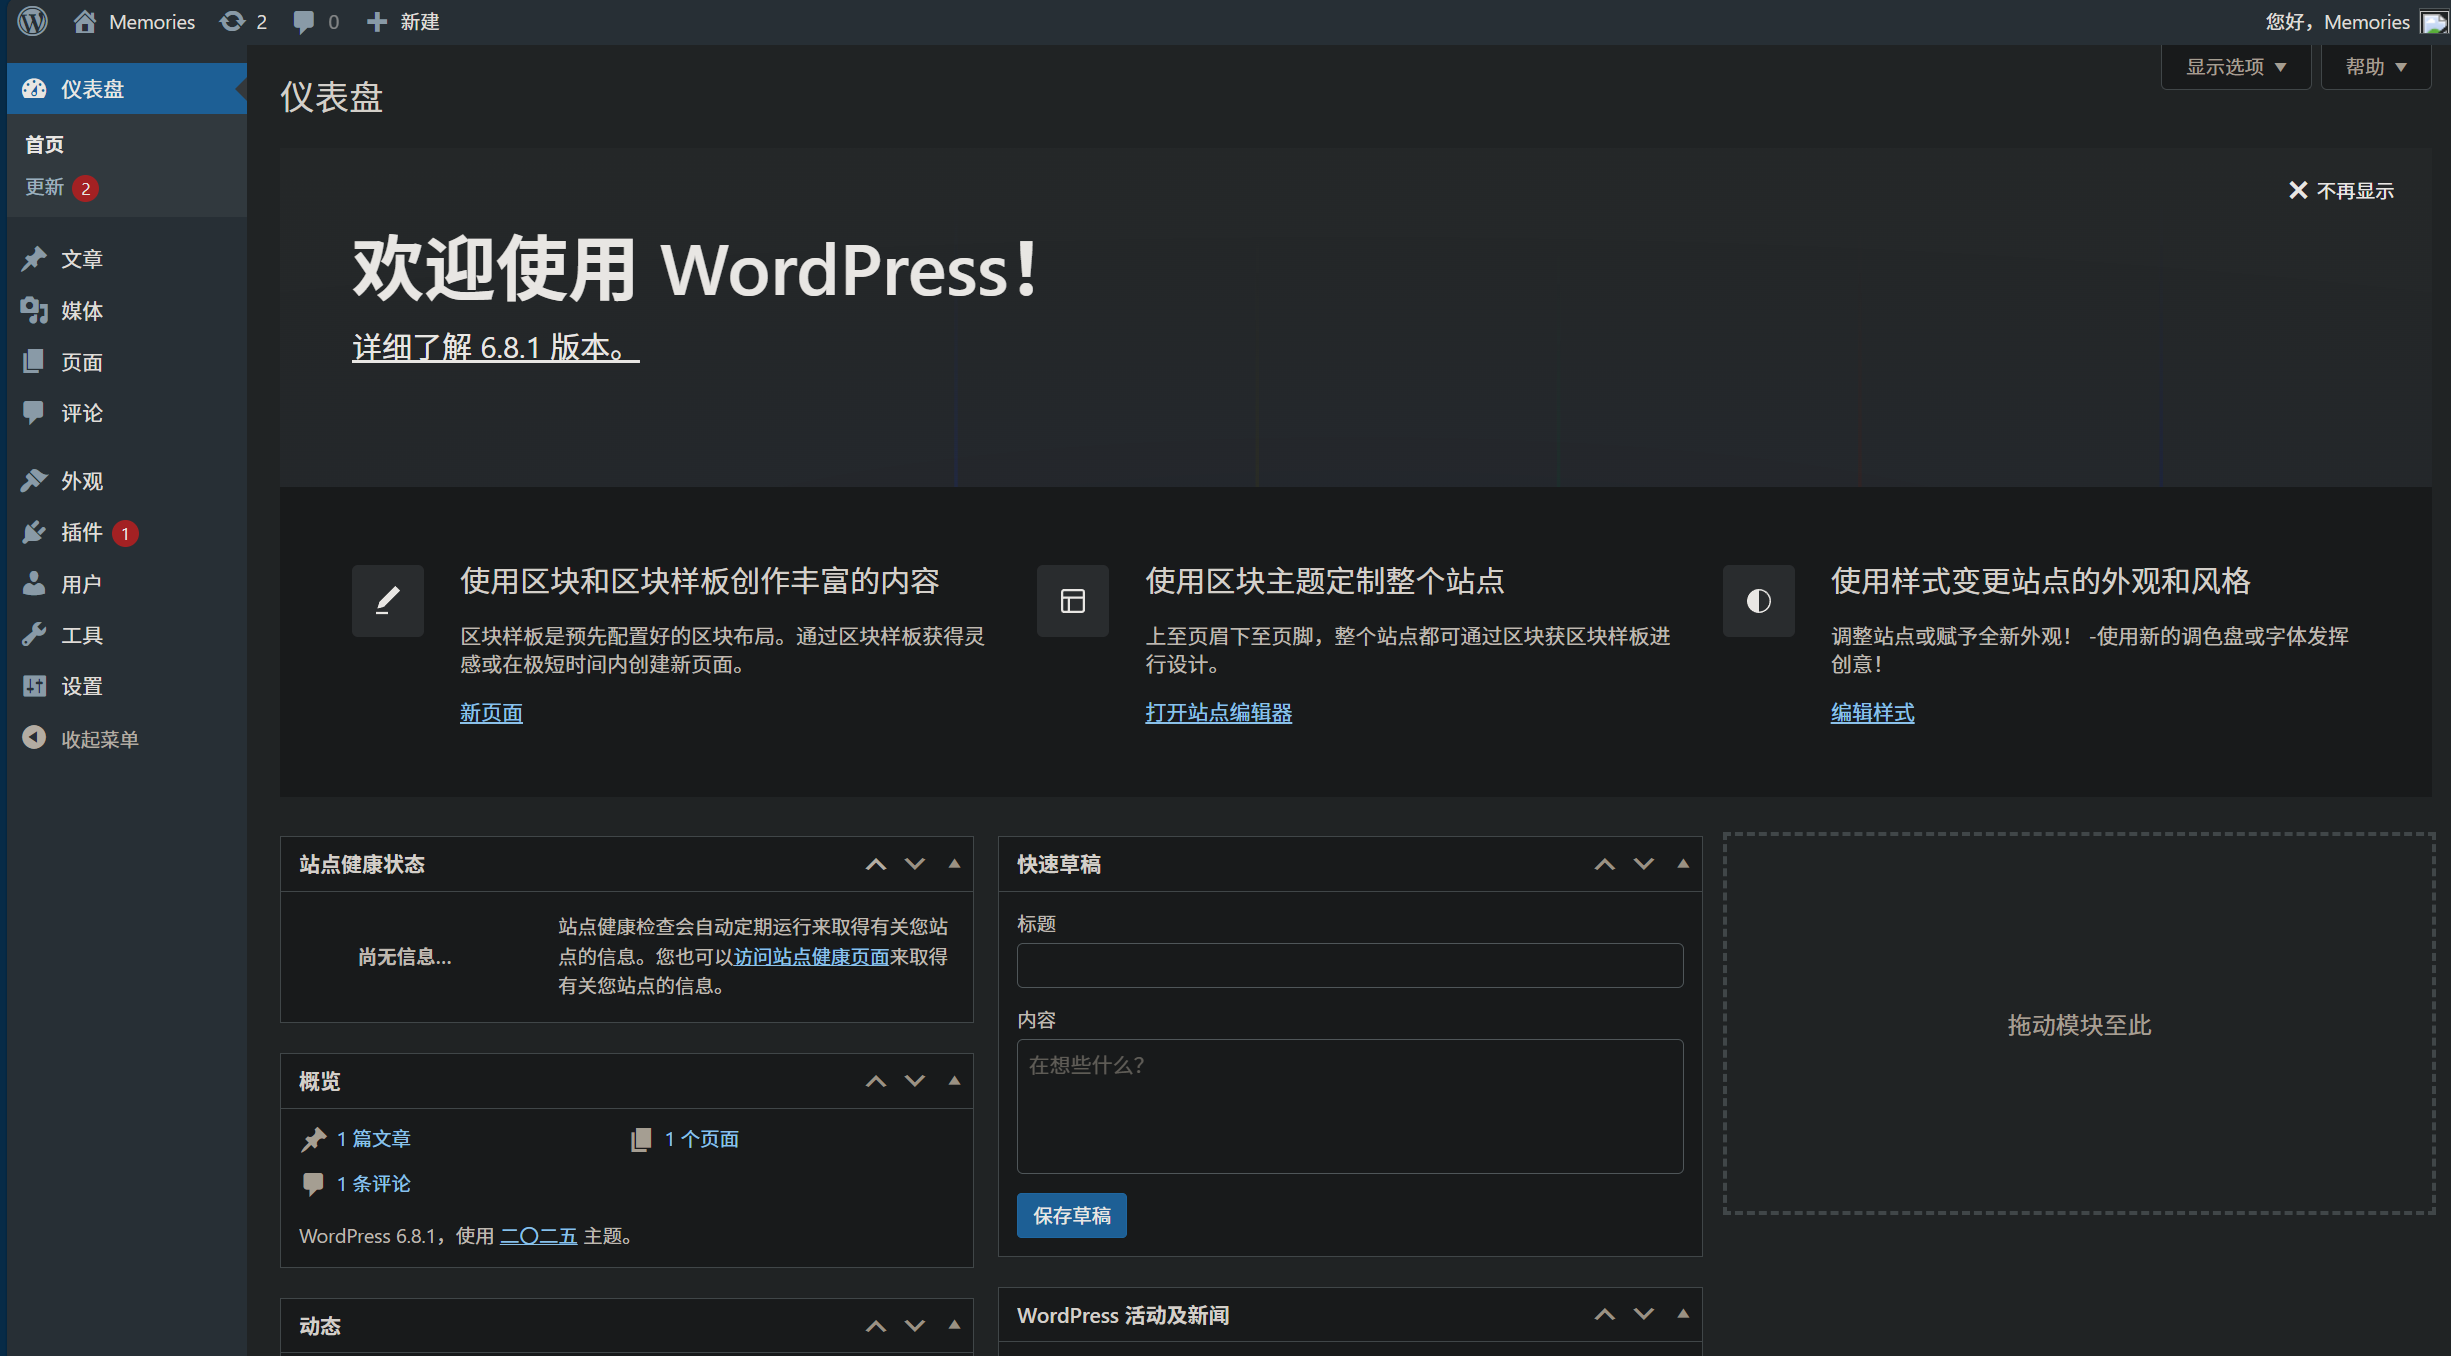
# 可选:添加安全密钥(从https://api.wordpress.org/secret-key/1.1/salt/生成)# 直接复制生成的内容替换下面的部分define('AUTH_KEY', 'put your unique phrase here');define('SECURE_AUTH_KEY', 'put your unique phrase here');define('LOGGED_IN_KEY', 'put your unique phrase here');define('NONCE_KEY', 'put your unique phrase here');define('AUTH_SALT', 'put your unique phrase here');define('SECURE_AUTH_SALT', 'put your unique phrase here');define('LOGGED_IN_SALT', 'put your unique phrase here');define('NONCE_SALT', 'put your unique phrase here');进入 WordPress 安装向导
http://你的ip地址/wp-admin后台管理界面
LNMP 环境部署
安装 Nginx
# 添加Nginx官方源cat > /etc/yum.repos.d/nginx.repo << EOF[nginx]name=nginx repobaseurl=http://nginx.org/packages/centos/7/\$basearch/gpgcheck=0enabled=1EOF
# 安装Nginxyum install nginx -y
# 启动并设置开机自启systemctl start nginxsystemctl enable nginx
# 配置防火墙firewall-cmd --permanent --add-service=httpfirewall-cmd --permanent --add-service=httpsfirewall-cmd --reload配置 Nginx 与 PHP-FPM
#创建 Nginx 虚拟主机配置vim /etc/nginx/conf.d/wordpress.conf
#内容server { listen 80; #这里的端口视情况调整,如果有Apache则调整端口号 server_name 192.168.0.0; # 修改为您的域名或IP root /var/www/html; index index.php index.html;
location / { try_files $uri $uri/ /index.php?$args; }
# PHP-FPM处理PHP文件 location ~ \.php$ { fastcgi_pass 127.0.0.1:9000; fastcgi_index index.php; fastcgi_param SCRIPT_FILENAME $document_root$fastcgi_script_name; include fastcgi_params; }
# 禁止访问敏感文件 location ~ /\.ht { deny all; }}#验证 Nginx 配置nginx -t#重启 nginx php-fpmsystemctl restart nginx php-fpm验证 PHP 与 Nginx 集成
#创建文件验证是否成功echo "<?php phpinfo(); ?>" > /var/www/html/info.php
#浏览器输入http://你的ip地址/info.phpWordPress 在 LNMP 环境下的配置
确保数据库已创建(如果之前已创建可跳过)
mysql -u root -pCREATE DATABASE wordpress DEFAULT CHARACTER SET utf8mb4 COLLATE utf8mb4_unicode_ci;CREATE USER '用户名'@'localhost' IDENTIFIED BY '密码';GRANT ALL PRIVILEGES ON wordpress.* TO '用户名'@'localhost';FLUSH PRIVILEGES;EXIT;#配置 WordPress 文件权限chown -R nginx:nginx /var/www/htmlchmod -R 755 /var/www/html
#浏览器访问http://你的ip地址/wp-admin出现后台界面即为成功
部署搭建LAMP-LNMP-WordPress
https://www.zfps.asia/posts/lamp-lnmp-wordpress/ 部分信息可能已经过时